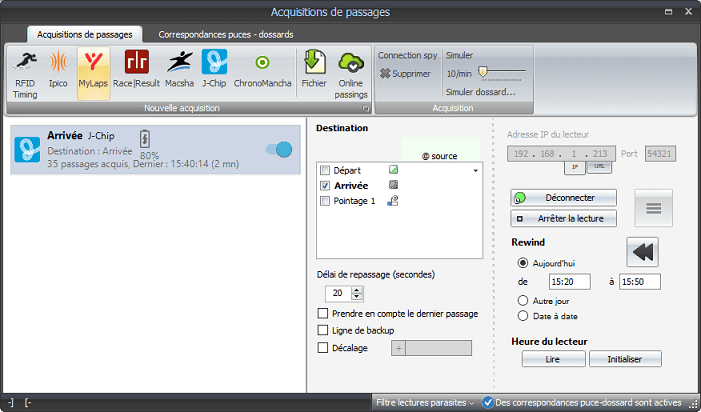
Today we are very excited to add a new hardware manufacturer to Wiclax. We are now able to communicate directly with J-Chip decoder.
Like many other readers and decoders, J-chip hardware can be connected to through tcp-ip, which is our preferred way.
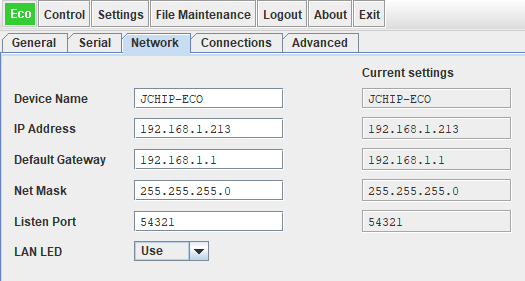
IP and port to be entered in Wiclax can be easily found and set in the Pro control panel utility from J-Chip.
Tags readings can be listen to in live or recalled later if needed. The rewind feature will be able to recall all readings since the decoder's started.
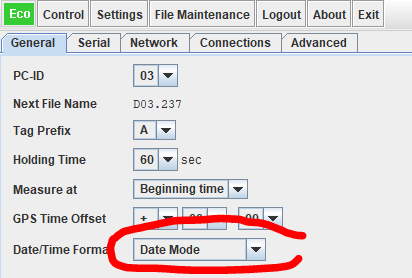
Note that we've taken advantage of the latest firmware from J-Chip that includes a complete timestamp with date. It's particularly usefull for events running over many days.
We strongly recommend to update and choose the date mode for the decoder.
By the way, we can already tell you that J-Chip will also be available from our cloud for remote split points. We'll be publishing very soon about that.
Sur le site de chronométrage, il est généralement utile de mettre en œuvre un réseau local.
Ce réseau a plusieurs objectifs :
accéder à Internet depuis le PC principal.
communiquer avec le matériel RFID.
donner accès au G-Live qui est hébergé sur le PC principal.
Un des écueils à éviter est d'utiliser 2 réseaux différents sur le PC principal (le wifi et le filaire), parce que l'accès au g-live est dépendant de l'IP locale du PC principal.
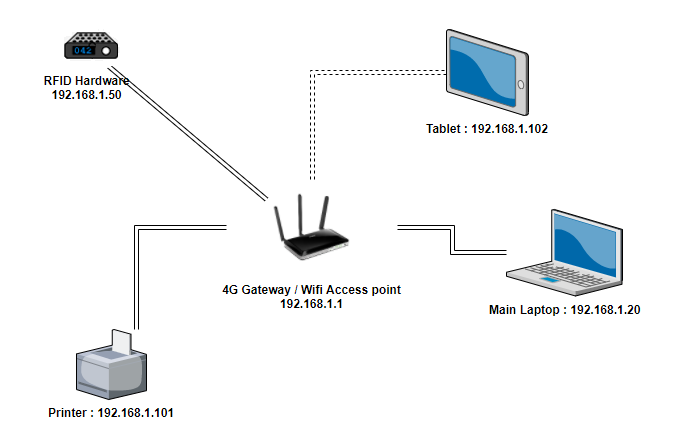
Le bon usage est donc d'utiliser une passerelle 3G/4G connecté au réseau local, de sorte que tous les matériels se connecte à un même switch et accèdent à Internet. Chaque matériel fonctionne dans la même plage d'adresse IP (192.168.1.x, par exemple).
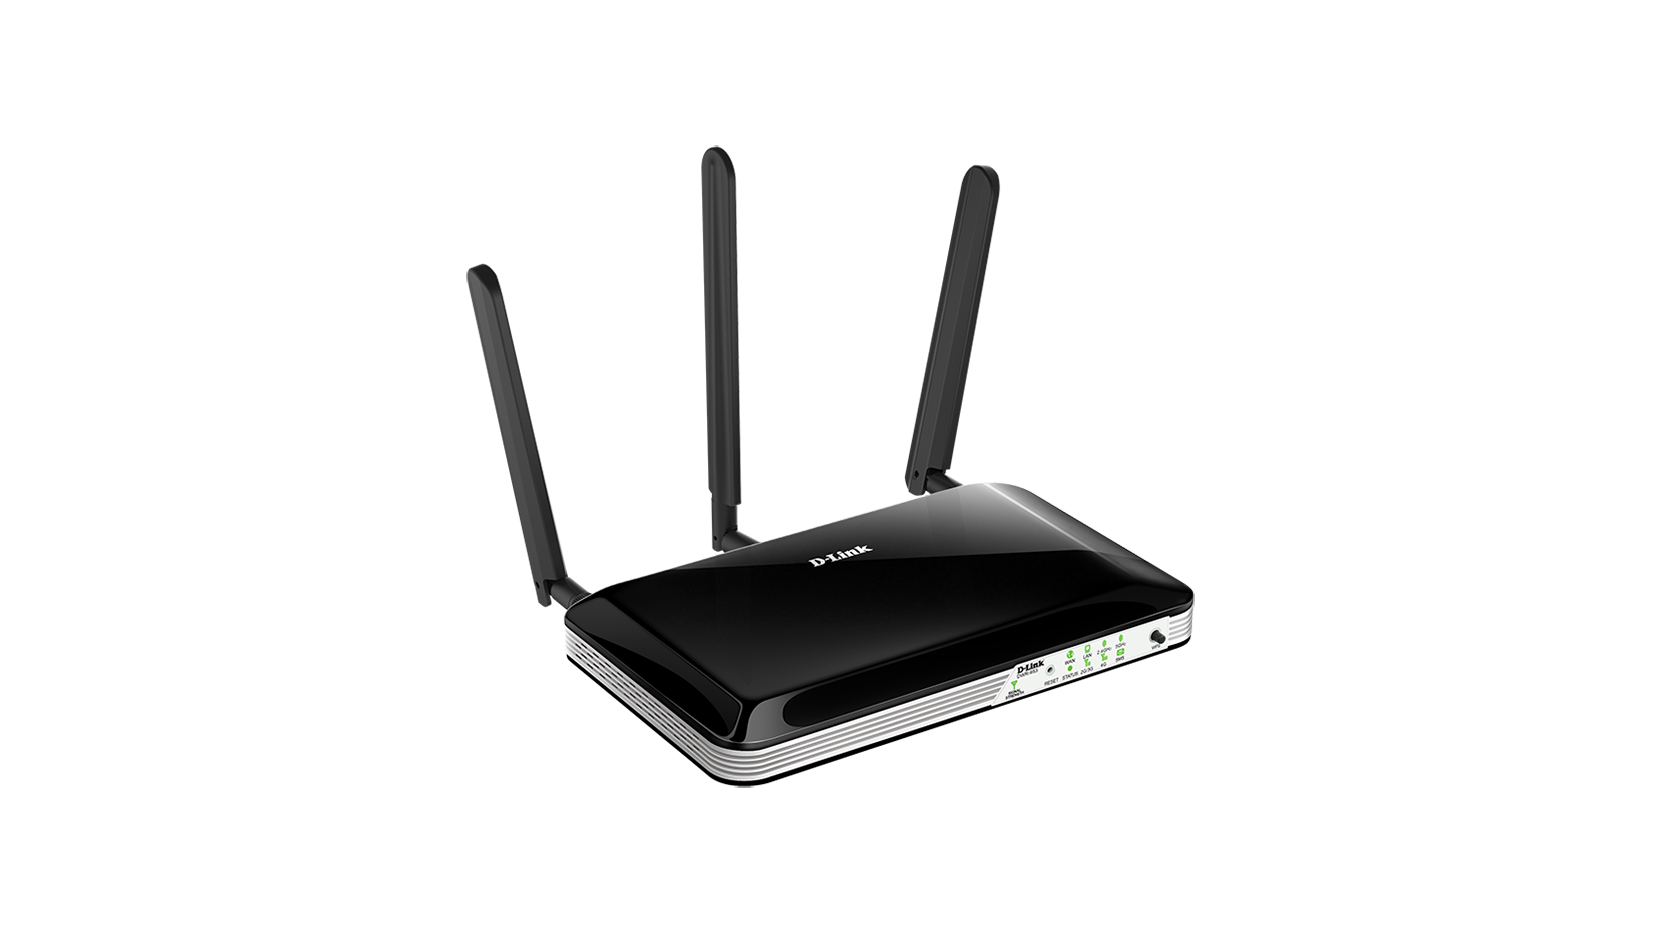
Sur nos propres chronométrages, nous utilisons cette passerelle 4G de d-link. Mais ce n'est pas le seul matériel qui peut répondre au besoin.
L'intérêt de ce modèle est multiple :
Il offre 4 ports ethernet permettant de connecter directement le PC principal et le matériel RFID avec des câbles réseau.
On peut insérer une carte SIM pour obtenir une connexion Internet pour la totalité du réseau.
Il propose un point d'accès wifi pour connecter par exemple la tablette de l'animateur et afficher le G-Live.
At a timing location, we usually have to build a local network.
This network has many purposes:
access Internet from our main laptop.
access our boxes or decoders from our main laptop.
give access to the G-Live seated on our main laptop.
One pitfall to avoid is using 2 different lan on the main laptop as it would confuse the G-Live.
The good practice to achieve that is using a 3G/4G Gateway connected to your local network so every devices can connect to a central hub and get Internet Access. Every device is working with the same network address range like 192.168.1.x e.g..
For our own timing we use this 4G Gateway from D-link. But it is not the only device that can do the job. The good points about this one:
There are 4 lan ports so you can connect your laptop directly and the RFID hardware with ethernet cables.
You can insert a sim card to get an internet connexion for your network.
It has also a wifi access point so you can connect a tablet for the commentator to display G-Live.
Starting to give a flavour of the new features already implemented, but not yet in a public release. So that you can wait for them, and give us a feedback in between.
Focusing this one today: if you are a user of Australian RFID Timing systems as we do, you will soon enjoy this new layout for your acquisitions. Not taking more place, the row will show up with the device's battery level, the visualization of the active antennas, the readers current mode, the power of each reader and the reading ON/OFF status.
In 2016, we can't think of timing an event in a manual way. So we have to make our favorite hardware talk to Wiclax. This is possible in a very simple way. Wiclax can interface with many systems on the market and the list is not closed.
Below is a quick video to show you how it can be done. It does not show all the possibilities as your timing configuration can be much more complex, with multiple readers/decoders or loops that can be either local or distant, and with multiple passings on some of them, etc... But it does make a short introduction.
En 2016, nous chronométreurs n'envisageons plus de travailler en saisie manuelle. Il faut donc connecter Wiclax à notre système RFID préféré. Notez que Wiclax s'interface largement avec de nombreux systèmes et que la liste n'est pas définitive.
Voilà une vidéo très courte pour montrer qu'il est très simple de s'interfacer directement avec un système (ici avec RFIDTiming). Il s'agit juste d'une introduction parce que bien sûr les configurations peuvent être beaucoup plus complexes : plusieurs matériels en local ou distant, plusieurs passage sur la même ligne, plusieurs boucles pour un seul décodeur, etc...